The Yarn Alliance closed to new subscriptions this week and I just want to take a moment to welcome all our new and renewing members. It’s been thrilling to see everyone jump on board and I am so excited about the upcoming season! We’ll be sending out welcome emails shortly but I wanted to take a moment right here to give my warmest personal welcome.
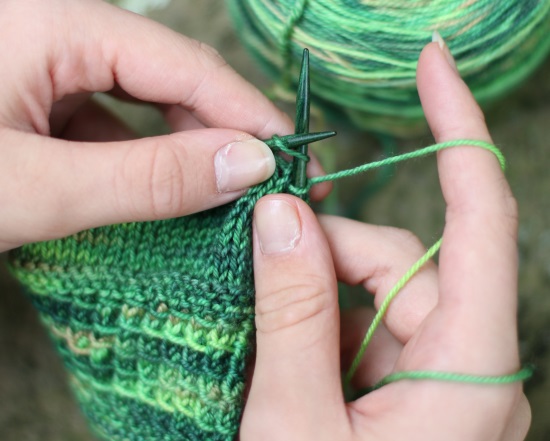
Now, I want to ask you a question: how do you tension your yarn? I’ve discovered that the way I tension for knitting is… well, complicated. Here’s what I’ve always done: yarn going over the back of my right hand and down between my thumb and forefinger, wrapped around my little finger, and then under my ring and middle finger before wrapping once clockwise around my index finger.
Yeah. I know. Read it again if you have to.
I have no idea when or how my tensioning became so complicated. I’ve been doing it for years and never given it a second thought but, just recently, I’ve been wondering if my way of holding my yarn was the most efficient option. So I’ve been watching videos to see how other folks do it, googling images, and asking the rest of the SpaceCadet crew… But oh my stars, when I play around with different ways of tension my yarn, I can’t believe how hard it is to get my brain to handle it. It fights me every. step. of. the. way. I can’t hear it screaming at me that it doesn’t like this, it doesn’t like this, and can’t we please just go back to the way we’ve always done it?!? Old dogs and new tricks and oh how I am failing!
I’d love your tips and suggestions if you have them. Does anyone else tension their yarn in such a complicated way? Have you tried a few different techniques and found one you like best? Can an old dog learn new tricks? I’d love to hear!
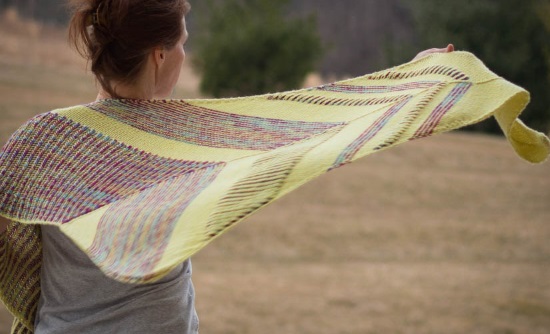
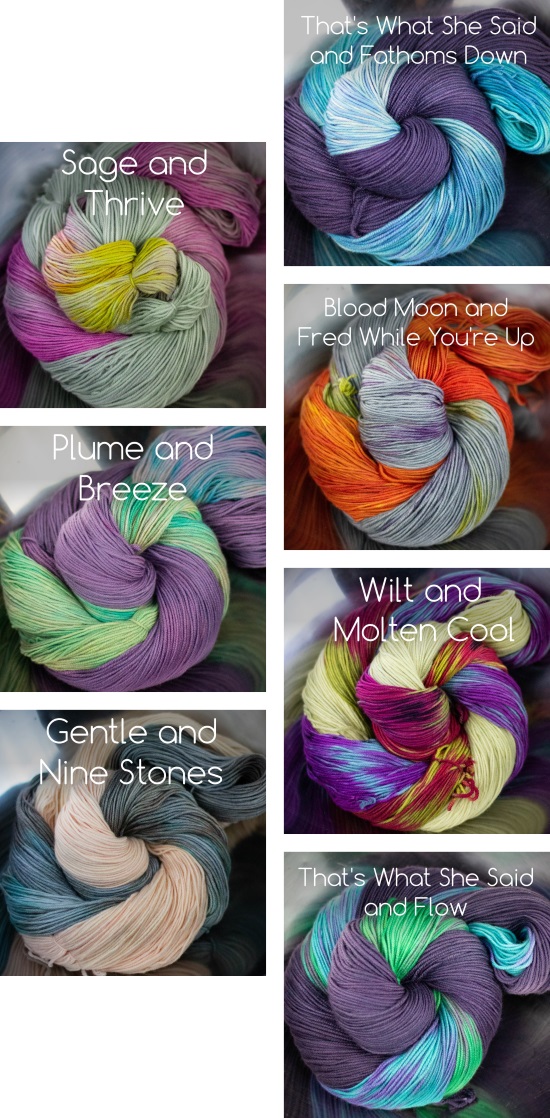
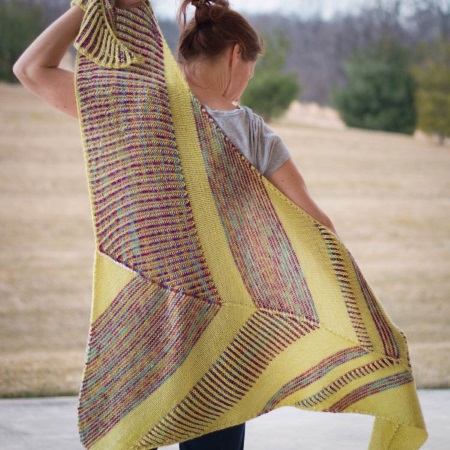
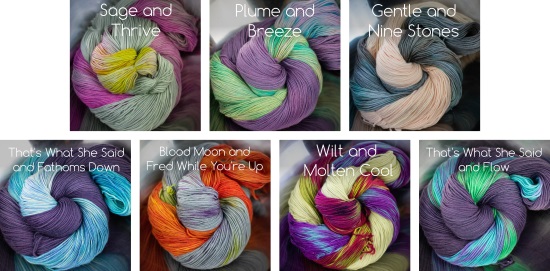
In the meantime, I’ve got great stuff to share with you, including this gorgeous new shawl from Simone Kereit (scroll down to my pattern picks to see it!) and kits in these beautiful colour combos.
But more on that in a minute. First, let’s start with some interesting fiber-world tidbits…
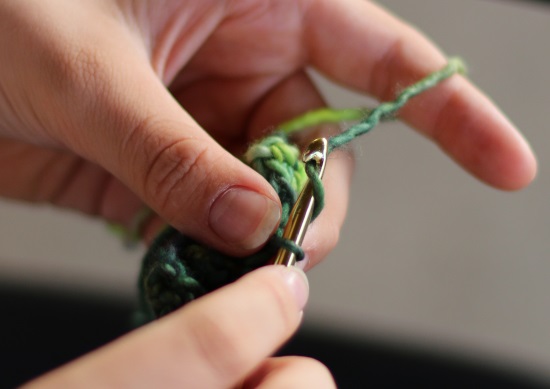
I was a knitter before I was a crocheter so, when I finally learned how to wield a hook, I was amazed to discover that I was accidentally adding stitches onto the edge of each row instead of moving up to the next row at the right spot. Not so easily done in knitting but a common mistake when learning crochet! So I loved the promise in this article about how to crochet a straight edge every time. Just the photos alone inspire confidence of forever-straight crochet! But it doesn’t mention using a locking stitch marker to mark the first/last stitch in each row, which is what I do now. Hmmm… is that crochet cheating?
Last week I shared a nifty tutorial on how to darn a sock but a lot more things than just sock heels wear through and need mending — and it’s not always possible to make those repairs invisible. So the solution is to turn them into miniature works of textile art through visible mending! This rather awesome pictorial guide shows you how to do it with woven fabrics (looks so good on old jeans!). And here’s how Hunter Hammersen turned holes in a cardigan into a garden of flowers. I love it so much!
The weather is turning (at last!) and the light feels somehow clearer, which makes me start to itch to spring clean but it’s a job that I always find so overwhelming (where to start?!?). So I googled Spring Cleaning 101 to see if I could find some tips… and the first one was this from Martha Stewart, which suggested (as tip #2) that I dust my lightbulbs. Oh my stars, I think Martha and I might live on different planets! Good for a laugh though. Anyone have any good tips for spring cleaning efficiently? I’d love to know — and would love to share them in a future newsletter too!
Do you have a go-to increase you use all the time? Mine is Make One (right or left, depending) but I learned a new one in this little guide to six essential increases every knitter should know: number 2, the Twisted Yarnover Increase. I’ve literally never seen it before (anyone else? or just me?) and I’m keen to try it!
Nothing to do with knitting or crochet, but I am currently obsessed with completing this logic puzzle each day. It took me forever at first, but now I get all four done in about five minutes and feel all accomplished (it doesn’t take much, clearly!).
Briochearrow by Simone Kereit
Simone Kereit’s gorgeous new design, Briochearrow, designed to play up the amazing, colour-shifting possibilities of brioche knitting. This beautiful asymmetrical shawl uses a semi-solid of SpaceCadet Lyra as the main colour and variegated contrast colour to dramatic effect, and we’ve put together kits in gorgeous colour combos that will bring out the best in Simone’s design. Click here to see them all!
Falls Ravine Vest by Robyn Chachula
Don’t you love it when a design looks all fancy and difficult but it’s really straightforward and simple to make? Robyn’s crocheted lace vest is made from a quickly repeating wave pattern that looks deceptively complicated and will get tons of compliments, but without you pulling your hair out in the process! Designed in fingering yarn, I’d work it up in sparkly Lucina or drapey Oriana, in Feather, Drizzle, or Sage.
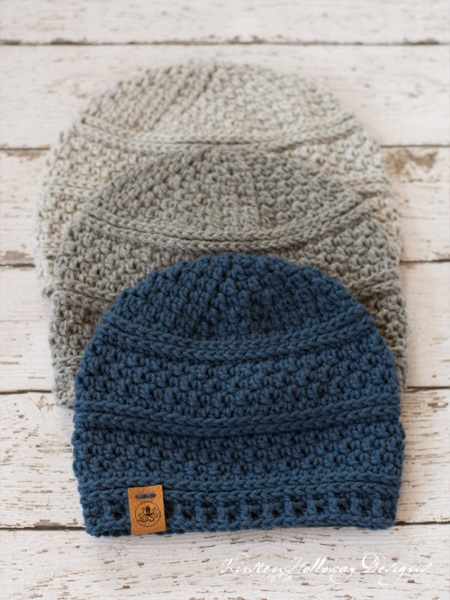
Simple Seed Stitch Beanie by Kirsten Holloway
There’s nothing like a hat to work up quickly for that feeling quick satisfaction! And when the pattern is as beautifully textured as this one, it’s double the fun. Designed in worsted weight, I’d make it in SpaceCadet Vega or Cressida. Oh, and see that little foldover tag on the hat in the photo? If you’re in the Yarn Alliance, that’s what you latest gift is for! Doesn’t it look cool?!?
images © the respective designers, used with permission
Today I’m photographing some great colour combo ideas for the latest Gradient Explorers colourway, and then I’m dyeing some yarns for one of our clubs. It’s going to be a busy day so I’d better get moving. I hope your day will be just as fun and, until next time, all my best!






We could all have dust-free lightbulbs if we hired people to clean our home like Martha does. I enjoy your lively posts.
Hahahahaha!!! I agree! 😀