5 Reason Why I Love Mini-Skeins More than One-Skein Gradients

5 Reason Why I Love Mini-Skeins More than One-Skein Gradients

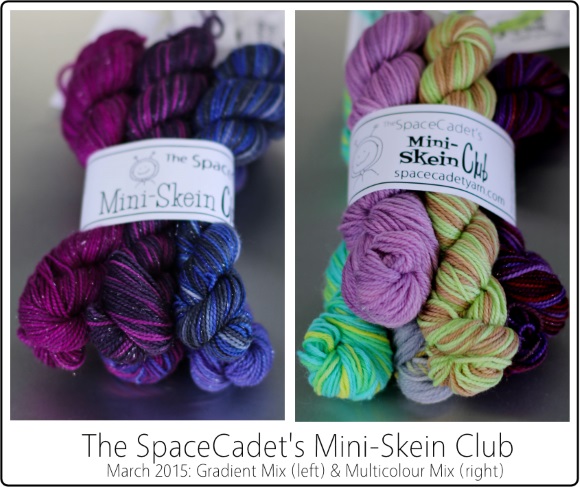
Gradients and ombres are awesome!  And they create stunning colour effects in all sorts of projects.   One of my favourite things is going through Pinterest to find amazing ways to use colour in knitting and crochet patterns, and the gradient and ombre projects just jump off the screen.

And while lots of them use single-skein gradient yarns, I gotta tell you that — personally — I prefer Mini-Skein gradients for those projects.  Yeah, it is because SpaceCadet makes Mini-Skeins (of course!) but, here, let me share with you the five reasons why I love Mini-Skeins way more than one-skein gradients

1. You Control the Colour Changes

So you’re knitting something beautiful and the lace section is coming to an end…  and that’d be the perfect place for the colour change to happen, right?  With a one-skein gradient, you don’t have any control over that — you just have to hope everything lines up — but with Mini-Skeins, you are totally in control.  If the lace section ends a few inches before one colour finishes, you simply switch to the next Mini-Skein and carry on knitting.  And your project looks so much more stunning — because you are entirely in control of the colour changes!

2. You can use Mini-Skeins to Add Pops of Colour to Any Project

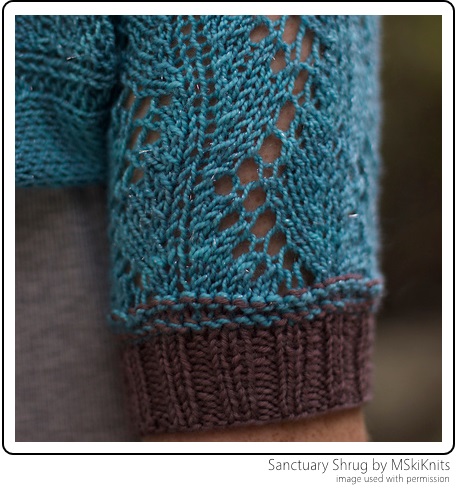
When you pick up a bundle of Mini-Skeins, it’s easy to think of them as a single unit — something that has to be used up in one project like a one-skein gradient — but Mini-Skeins aren’t like that at all.  Break that bundle up and what you have a bunch of yarn-crayons that you can use anywhere and in any combination.  Pick one colour for a contrasting edging on a collar or cuffs (like MSkiKnits’s beautiful Sanctuary Shrug, below).  Or take a basic gray sweater and line the pockets in bright red that just barely peeks out.

The Sanctuary Shrug by MSkiKnits uses SpaceCadet Mini-Skeins to create a pop of colour

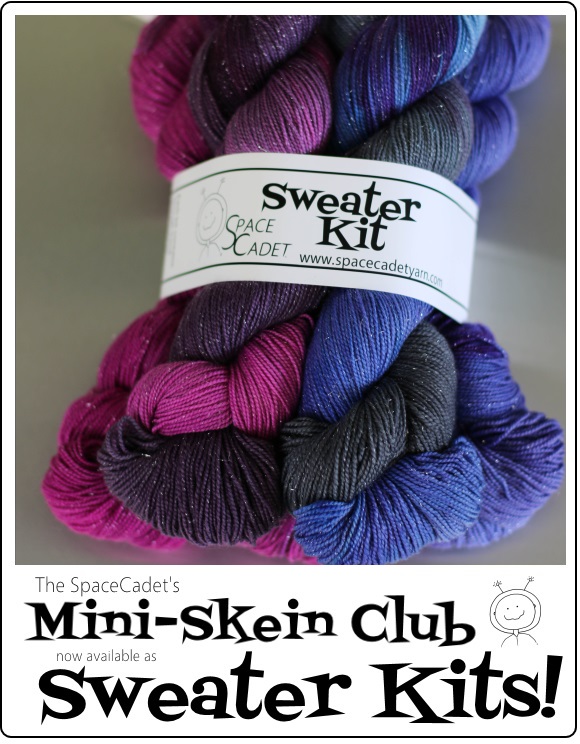
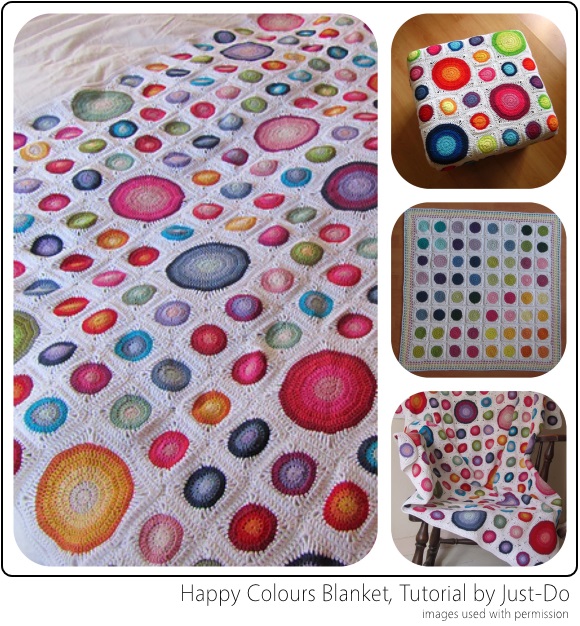
3. You Can Use Them to Create Larger Projects

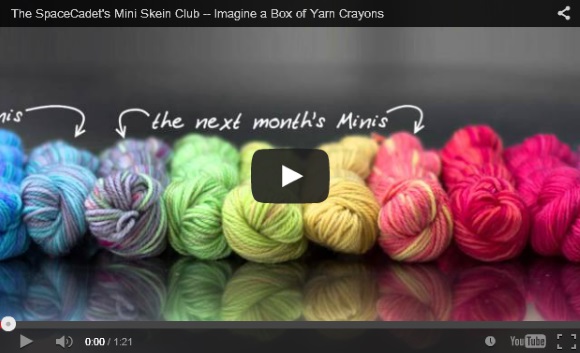
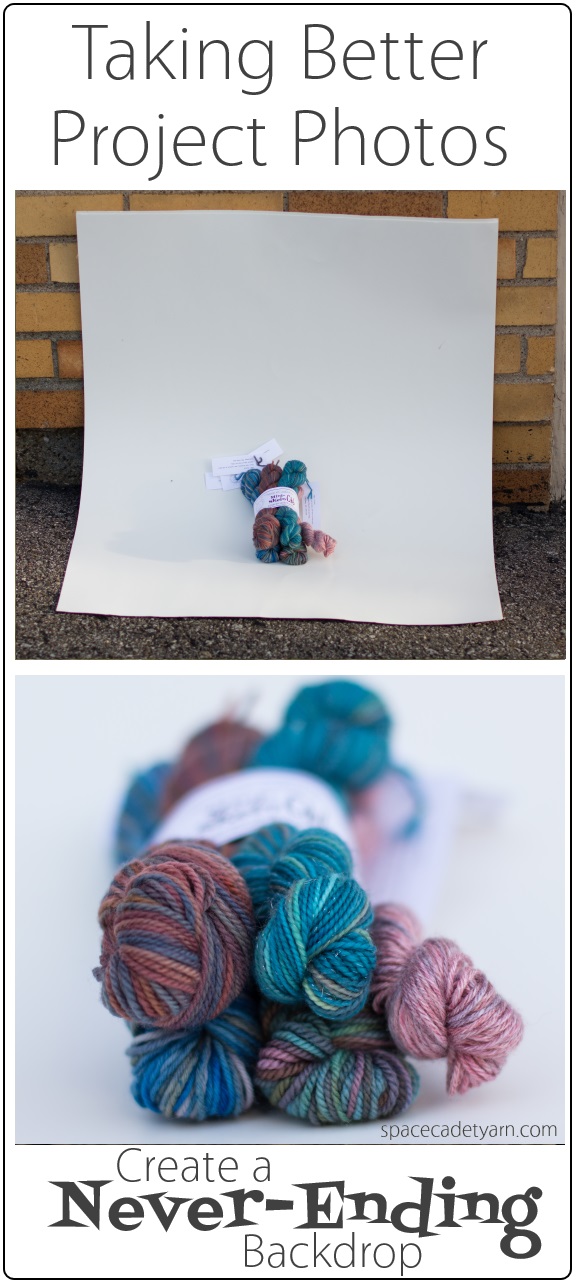
We do something amazing with our gradient Mini-Skeins — each month’s colourway blends into the next month’s colourway so that, month after month, you can collect a stunning Never-Ending gradient.  One-skein gradients work perfectly in one-skein projects — and, with careful thought, can sometimes work in larger projects — but with the Never-Ending gradient Mini-Skeins, you are free to use your Minis in as large a project as you like!

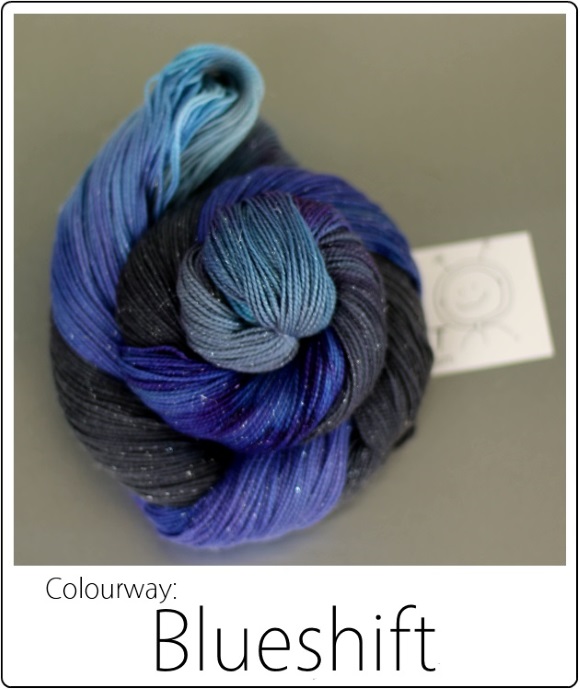
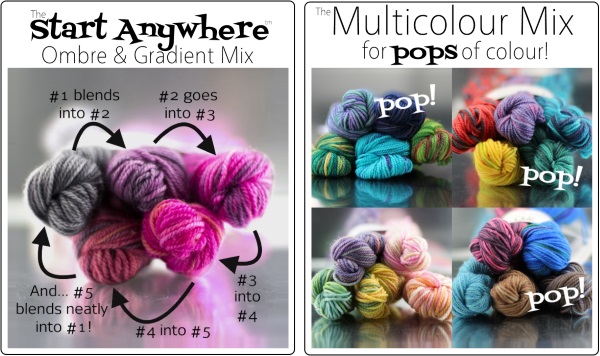
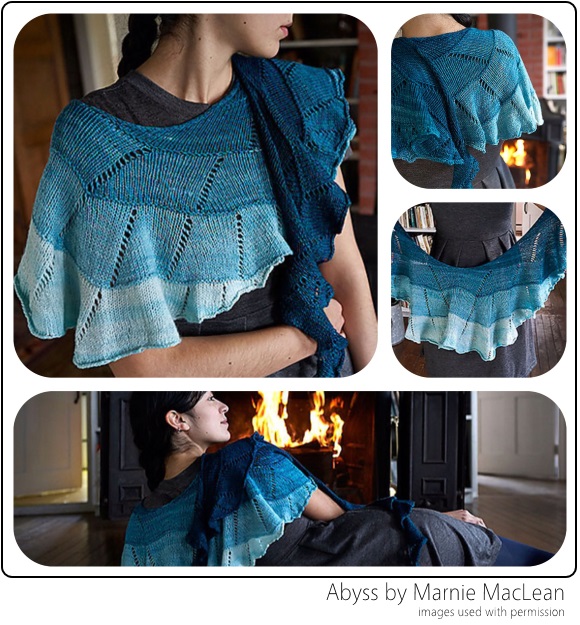
4.  You can Start Anywhere

So you’ve found this gorgeous gradient and the thing you love love love about it is that amazing magenta right there in the middle of the skein.  Except you want it right on the edge of your shawl where it will really stand out, not buried in the middle.  With a one-skein gradient or even with most mini-skeins sets, you’re stuck — the colour progression is set and it wouldn’t work in any other order.

The Start-Anywhere Gradient Mix, from the SpaceCadet's Mini-Skein Club, July 2014

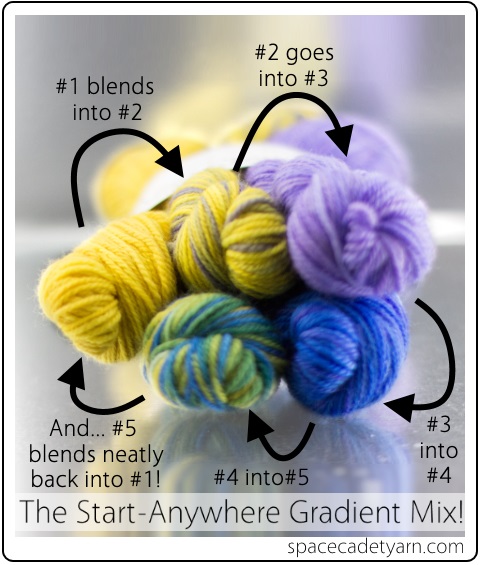
But our Mini-Skein gradients are uniquely designed to work in a complete circle, so that instead of starting a project at Skein 1 and working through to Skein 5, you could start a project anywhere in the set, and the skeins all work together.  You you won’t get that in any other gradient.  So hooray — your magenta can be on the edge.  You’re completely in control!

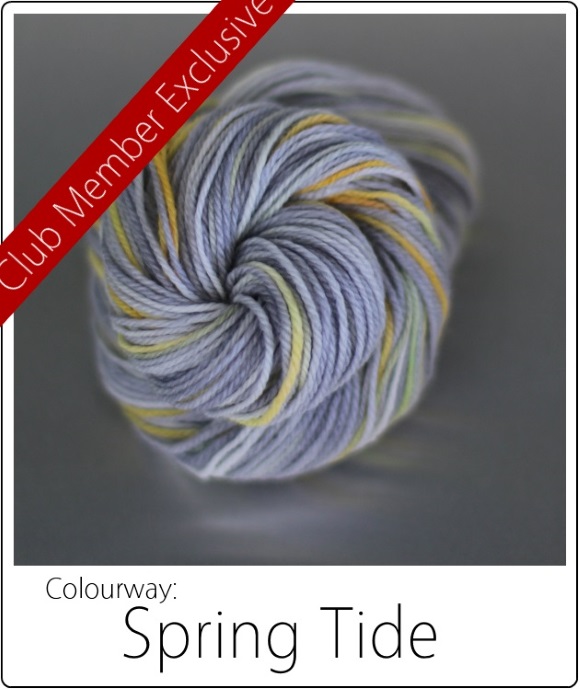
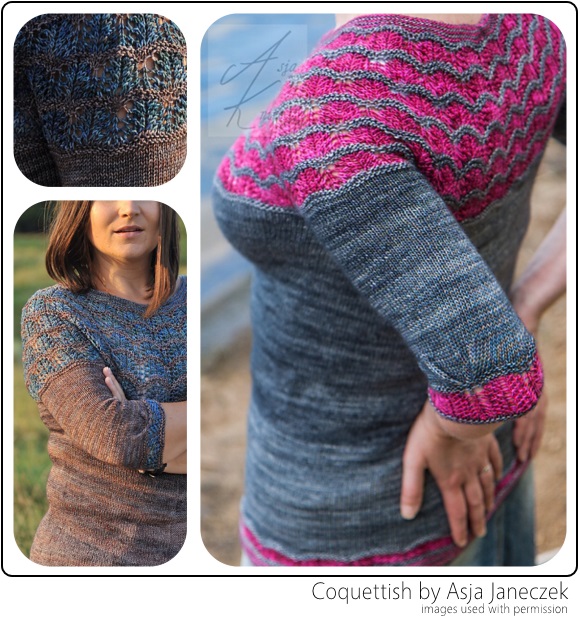
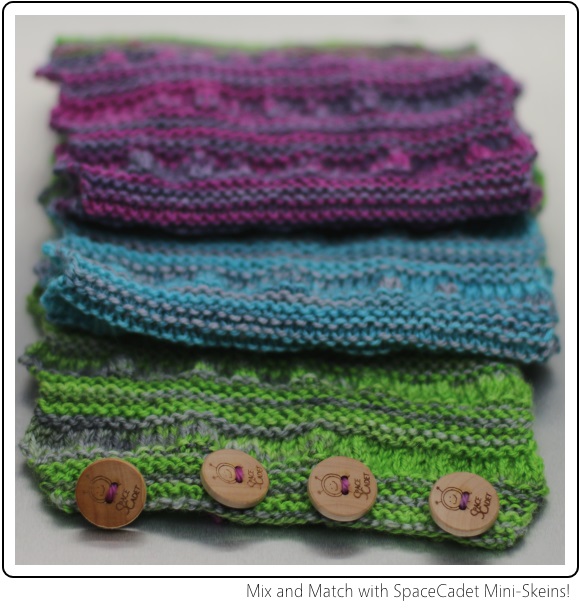
5. You can Mix and Match between Gradient Sets (Or… Your Favourite Colour isn’t Trapped)

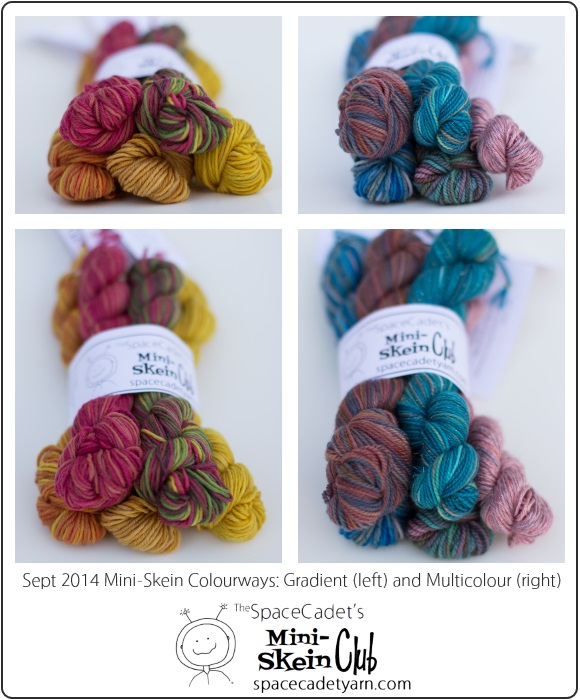
When we dye a set of gradient Mini-Skeins, we’re telling a colourstory — a story that starts with one hue, moves gently through several others, and finally ends with the last hue — just like a one-skein gradient.  So these colours all work together beautifully within the set, but the cool thing with Mini-Skeins is that you are not limited by the colourstory we dyed.  If you find yourself wishing you could pair up a colour from one set with a colour from a completely different set…  well, you totally can!  Your favourite shades aren’t trapped within their separate gradient  — they’re Mini-Skeins, so you just take them out of their sets and put them together any way you like.

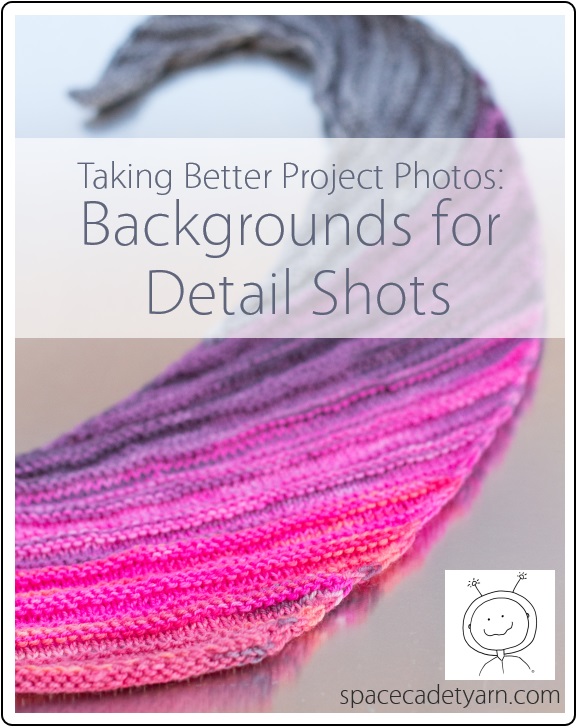
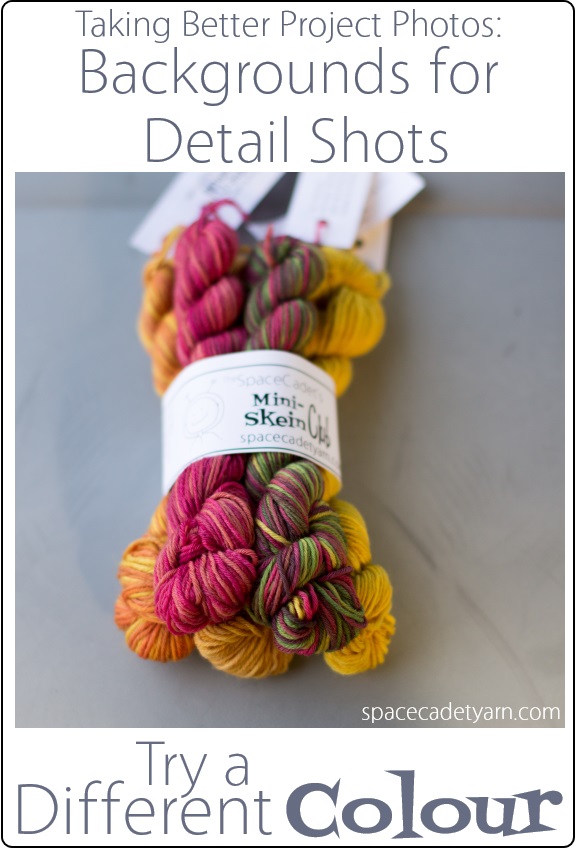
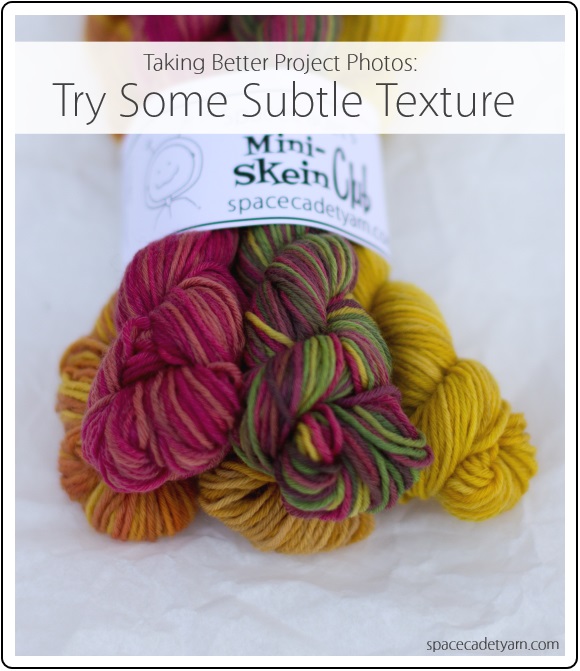
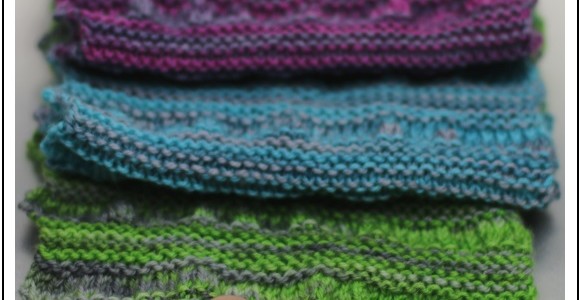
My assistant Jade did exactly that when she spotted three Mini-Skeins from two different sets that she thought would work beautifully together.  Each skein played a bright shade against a background of gray and so, while the brights pop and bounce, the gray ties everything together.  Because they were dyed on Mini-Skeins, none of these colours was trapped within a different  gradient — and the result is gorgeous!

Mix and Match with SpaceCadet Mini-Skeins!


So you see, Mini-Skeins gradients give you amazing control and endless options for colourplay!  Go for a big project or small, create eye-catching pops of colour, and mix-and-match your skeins.  Best of all, you are always in control.  And for that reason more than any other, I love Mini-Skeins for gradients!

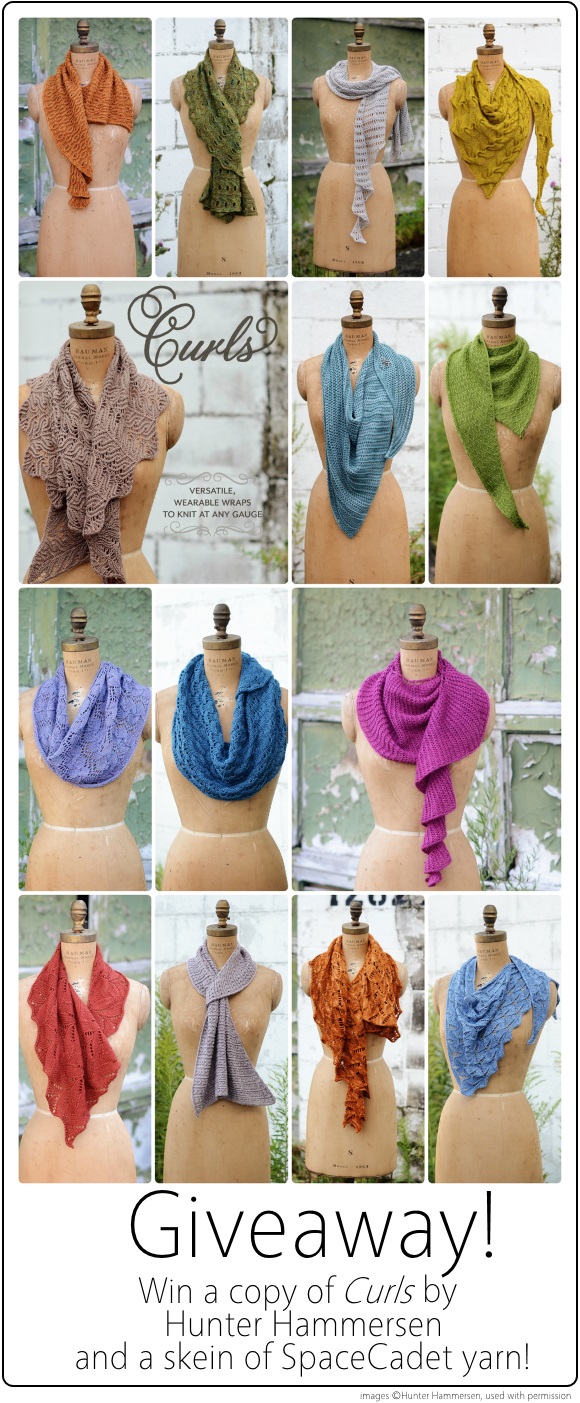
You too? Click here to check out the SpaceCadet’s Mini-Skein Club!

Full-Skeins of March’s Mini-Skein Colourways!

A customer recently emailed to tell us that she loved all our Mini-Skein bundles but wanted to tell us that “some months they are outstanding”.  We put so much enthusiasm into each month’s dyeing that I just can’t tell you how much that meant to me.  And I have to say, I think March’s Mini-Skeins fall right into that category of “outstanding”.  Check them out:

The SpaceCadet's Mini-Skein Club, March 2015 580

Are you drooling over any of them?  I am particularly drawn to the Gradient Mix this month (on the left).  There is just something about those intense jewel tones mixed with subtle grays and blacks that get my fingers itching to cast on!  And if you’re feeling the same, here’s some great news…

Full Skeins and Sweater Kits of SpaceCadet® ‘s March Mini-Skein Colourways!

Each month, we pick our favourite colourways from both the Multicolour and Gradient Mixes, and offer them to you as full skeins and sweater kits on a selection of SpaceCadet bases. Some are exclusive to the Club members and some available to everyone, so you can order one skein or a sweater’s quantity — it’s up to you — to make a gorgeous, full-sized project with those fantastic Mini-Skein colourways!

The SpaceCadet's Mini-Skeins Now Available as Sweater Kits


Ready to see this month’s full skein picks? Here they are!

Blueshift — from the Gradient Mix

The SpaceCadet's Mini-Skein Club Full-Sized Skeins -- Blueshift 4 580

A Blueshift is a shift in the lines of an object’s spectrum toward the blue end, indicating that an object is moving toward the observer.

Blueshift is a stunning combination of blues, grays, and blacks that swirl and shift across the skein.  Reminiscent of the deep night sky and available on three different bases, it creates a dramatic look for anything from shawls to cardigans to capes.

Click to order


Spring Tide — Members’ Only Multicolour

The SpaceCadet's Mini-Skein Club Full-Sized Skeins -- Spring Tide 2 banner 580

The Spring Tide occurs only when the Earth, Moon, and Sun are in a straight line

Dyed in sublime shades of soft grays spiked with sunbeam golds and oranges, which blend together to create touches of beautiful sea-greens. Available on three different bases.

(Where’s the order button? This colourway is exclusive to March Club members. If that’s you, look for an email arriving shortly with your members-only link!)


Aurora Polaris — A March Multicolour

The SpaceCadet's Mini-Skein Club Full-Sized Skeins -- Aurora Polaris 3 580

The Aurora Polaris is the aurora of the Northern Hemisphere, also known as the Northern Lights

Drenched with the luminous greeny-blues and vibrant yellows of the Northern Lights, Aurora Polaris creates a colourplay that welcomes spring with abandon.  Available on three different bases.

Click to order


Blackberry Winter Gradient Sweater Kit

The SpaceCadet's Mini-Skein Club Sweater Kit in Blackberry Winter banner 580

Blackberry winter refers to a cold snap that often occurs in late spring when the blackberries are in bloom.

This colourway moves from a deep lavender through vibrant raspberry before descending into a deep grays and blacks.  Available on three different bases, it would be stunning in a full sweater, and equally beautiful paired with a contrasting colour for gradient stripes.

(Where’s the order button? This kit is exclusive to February Club members. If that’s you, look for an email arriving shortly with your members-only link!)


Here’s how it works:

If you are a member of the Club that month, you have access to all the colourways we are dyeing that month, including exclusive access to

The Full Gradient Mix as a Sweater Kit!
Each month, our gorgeous Gradient Mix is available as a full sweater kit exclusively to the Club members who received a bundle that month. If you’re in love with the Gradient Mix’s wonderful colour shift and are itching to use it in a larger project, you can order it as a breathtaking five-skein sweater kit.

One Multicolour Mix Colourway as a Club Member Exclusive
You know the Multicolour Mix is an explosion of colour! Each month, we pick our very favourite Multicolour Mix colourwayand make it available exclusively to our Club members who received a bundle that month.

If you’re not a member of the Club that month, you’re still in for a treat!

One Gradient Mix Colour in Full Skeins There’s always one colour out of the Gradient Mix that we pull out of the dyepots, gasp, and think, “I want a whole sweater in this colour!”  Great news: we pick our favourite and offer it in full skeins to everyone!

One Multicolour Mix Colourway as Full Skeins Each month, the Multicolour Mix is an adventure in colour and we never know how many of its colourways we’re going fall head over heels for. We pick one that we really enjoyed dyeing and offer to dye you some more!

But you’ve gotta be fast! They’re available for two weeks only!

Because we’re always getting ready for the next month’s dyeing, these full skeins will be available for a very limited time — two weeks only — to allow us to get them dyed, prepped, and out to you as quickly as possible. So make sure you’re watching the blog or — even better — get on our mailing list so you never miss the release of new colourways!


What to get access to all the colourways next month? Join the Club!

Working with mini-skeins is like drawing with yarn, and each little bundle of colour becomes a new and exciting addition to your palette! The SpaceCadet’s Mini-Skein Club is a wonderful way to discover all the amazing, creative things you can make with these gorgeous little skeins — delivered straight to your door! Click here to learn all about it.

Click to learn about the SpaceCadet's Mini-Skein Club!

I Just Have to Show You This! (Plus: Mini-Skein Pattern Picks)

We’ve got some beautiful Mini-Skein Pattern Picks for you this month but, before we get to that, I’ve just gotta share something with you.  We’ve had so many awesome changes to the Mini-Skein Club lately (such as the innovative 360° blend of the Start Anywhere™ Ombre&Gradient Mix and the stunning month-to-month flow of the Never Ending™ Gradient) that I really wanted to update the club page to reflect that.

Two Mix Image 600

And what I really wanted was to to show it all off in a new video:  something bright, happy, bouncy, and fun — everything that the Mini-Skeins bring to our club members every month.

Now, the trouble was that I really didn’t know much at all about creating videos.  But I decided to try to teach myself Premiere Pro and, after a really steep learning curve on and a lot of frustration(!), I finally got the video I was hoping for.  And I’ve been dying to share it with you ever since!  I hope you’ll forgive me just a little showing off, but I’m just so darned proud of it.  Here is our new Mini-Skein Club video:

(Squee with me?)


January’s Mini-Skeins

This month, we took our Mini-Skeins in a moodier direction.  Both the Multicolour and the Ombre&Gradient went a little darker and pensive — and I have to tell you, I loooove the way that plays into the Never Ending spectrum.  After all those bright colours, a little depth looks really amazing.  Where do you think we’ll take it next month?

Never-Ending Gradient Oct-Nov-Dec-Jan 600(click here for a larger image)


Jade’s Mini-Skein Pattern Picks

Ok, you’ve waited long enough!  So, without further ado, let’s turn it over to Jade for her Pattern Picks for this month’s Mini-Skeins…

Happy Colours Blanket & Tutorial by Just-Do

Happy Colours Blanket & Tutorial by Just-Do
Maybe it’s the shorter days, or that everything outside has gone gray, but I’ve been craving bright pops of colour lately – and this crocheted blanket has plenty!  With options for large and small circles, varying yarn weights, and adjustable dimensions, it’s an extremely versatile way to use 3 (or more!) bundles of minis and a contrast colour.  The colours (either the new never-ending ombres or bright multis would be stunning) will pop against a white or pale shade (like Sliver) or dazzle against a black or dark shade (like Dark Skies).  And the best bit from our point of view? They look a bit like planets in space!


Abyss by Marnie MacLean

Abyss by Marnie MacLean
I came across this shawl in early November, and knew it would be perfect for ombre or gradient minis, if it just didn’t require so much yardage (960 yards, which would be at least a double subscription!)  That very problem, though, is exactly what makes it so perfect for the never-ending ombres – the delicate drape and smooth stockinette stitch would showcase all the subtle shifts in colour, and the size of the shawl ensures that you’ll flow through at least two full gradients and into a third!


Coquettish by Asja Janeczek

Coquettish by Asja Janeczek
And if you’re looking for something for just one bundle of minis, try this gorgeous pullover that features a feather-and-fan accent at the yoke, cuffs, and hem.  It looks great in two contrasting colours, but how much fun would it be with an ombre or gradient bundle against Sliver, Drizzle, or Dark Skies?  You’d only need 1 bundle of mini skeins, and depending on size, 3-4 skeins of a contrast colour.


Last Chance to Enter our Giveaway!

Don’t forget to enter our fabulous giveaway for a copy of Curls, Hunter Hammersen’s stunning new book of patterns, and a skein of SpaceCadet Oriana yarn to cast on with.  All you have to do is click here and leave a comment at the bottom of the post, telling us what you love most about Hunter’s designs.  But hurry — the giveaway closes Sunday night!


Giveaway! Win a copy of Curls, the new book of patterns by Hunter Hammersen, and a skein of SpaceCadet Oriana yarn!
For full official rules, go to http://wp.me/p1TnPQ-1Uf

The #1 Tip for Better Project Photos

In my last two posts about taking better project photography, we discussed the impact the background can make (and it can make a big difference — if you haven’t read those posts, click here and here).  But in this post, I’m going to give you the one tip that — hands down — goes the furthest to making your project images look spectacular.

No 1 Tip for Taking Better Project Photos

Shoot Across Your Project

Ok, what do I mean by that?  Well, first of all, we’re talking about detail shots here, things that are close up, and not overall portraits.  So, this is when you’re trying to capture the details of the stitchwork, the edging, or the flecks of colour in the yarn.

You could photograph any of these by holding your camera head-on to your project and just taking a picture but, even if you come in close, that image is going to end up looking flat and…  well, kind of boring.  Look at this picture of my Leftie, knit in Oriana in Sliver and a set of SpaceCadet Mini-Skeins.  The picture looks nice enough but… well, just that: nice enough.

Flat Photos Can be a bit Meh


But then I took another photo of it and, this time, instead of hold my camera straight on so the project was flat to the camera, I got down low and took the shot across my knitting.  See how different this image feels?  Don’t you feel like you’re right there next to shawl?  Almost as if you’re somehow falling into the picture?  Even though this isn’t a very good image (I took under heavy cloud cover just as the sky was about to dump a bunch of snow on us), changing my angle and shooting across my Leftie really brings the project to life.

Shoot Across your project

The Rules for Shooting Low and Close

So far, so simple, but there are a tips that will help ensure your low and close images come out as amazing as you hope they will.

Tip #1 — Use Your Macro Setting

If you’re using a regular camera, be it a point-and-shoot or a DSLR, you’ll most likely have a macro setting (look for a little flower icon on your setting selector).  Choosing this will allow your camera to focus in much closer than your other settings, to really pick up the smallest details.  And it will blur out the background, to help the viewer’s eye to gravitate to exactly the details you want them to spot first.

Use your macro setting

If you’re using a phone-camera, it can be a little more complicated, because there’s usually no built-in macro setting.  But you’ll get the best results if you remember to keep your camera low to the object you’re photographing, shoot across your project rather than directly at it and, most importantly, remember to touch the screen to tell the camera exactly where you want it to focus.  Doing those things will go a long way to getting a macro-like image.


Tip #2 — Get Down, Baby!

Really, seriously, there is no substitute for this.  Whether your object is on a table or on the floor, get down to that same level so you can truly shoot across it.  Most likely you will not look elegant doing it — I swear my neighbours must think I have a foot fetish for how often I’ve been flat to the ground taking close-ups of socks — but your pictures will look so much better for your potentially ungainly efforts!

Look at this image of Laura Nelkin’s Ribband bracelet, for instance.  It wouldn’t have looked nearly as good if I’d shot it from standing, looking down and having the ground and pair of feet for a background.  Instead, by getting right down, I was able to catch the light in the beads, and create that falling-into-the-picture feeling again.

Get down


Tip #3 — Use a Never-Ending Backdrop

When you are down low to take pictures across your project, your camera is going to capture not only what your project is sitting on but also whatever is behind it.  There are a lot of backgrounds that can look really wonderful when they are blurred out by a macro lens but, if you want to keep it simple, just choose a never-ending backdrop.

What do I mean by “never-ending”?  It’s the background you always see models standing on in magazines, where it’s one continuous colour and you can’t tell where the “floor” ends and the “wall” begins.  It looks really fancy, but it couldn’t be easier to create for your knitting or crochet projects…  just grab a 75¢ piece of posterboard and prop it up against a wall.  Now when you get down low to take your photo, the camera will capture the posterboard running under your project and seamlessly up behind it as well.  There will be nothing to distract the viewer’s eye and so all the focus will be on your beautiful project.

Create a Never-Ending Backdrop

Now It’s Your Turn!

So there you have it — a very simple tip that can vastly improve the look of your project photos.  And now it’s over to you: grab your camera and your most recent project and experiment with shooting images at different angles.  And before you know it, you’ll be changing your photos from something “good enough” to something smashing.  Check out the difference in my photos of Kate Atherley’s Sick Day Shawl

Shoot Across your project 2b

And hey, when you do grab your camera and start playing, please come over to the SpaceCadet group on Ravelry and share those images with us.  We’d love to see how your photography changes when you get down with your project!

Better Project Photos: Backgrounds for Detail Shots

In my previous post, I shared some great ideas for improving your project portraits by choosing backgrounds that really make your finished object shine.  If you haven’t read it, click here — it’s amazing what a difference the right background can make!

Take Better Project Photos - Backgrounds for Detail Shots

But you want to take some detail shots too right?  Because sometimes the things that make our project just amazing are in the details — the intricate stitchwork, the seam that you sewed so beautifully, the subtle stitch-by-stitch colour changes in the yarn.  For those shots, you need to get your camera in close to your project and, to really show the details off to their best, the background you choose will make a huge difference.

We started the portrait-photo post with a pet peeve of mine (Don’t Stand in Front of that Bush!) and we’re starting this one with a pet peeve too — one I see all over Ravelry and that always gives me the sads…

Don’t Shoot on that Blocking Mat!

I know your project looks amazing when you finally get it blocked out and all the stitchwork opens up.  I know you’re excited (and you should be!) and you just want to grab your camera and take photos now.  Or maybe you don’t want to actually model it yourself (and that’s ok) but, please, put your camera down.  To me, taking pictures on a blocking mat is a little like getting all dressed up for a family photo — you in your best outfit, your hair fabulous, you’re looking amazing — and then… wearing your house-slippers in the photo.

It’s the same with a blocking mat — that dull surface and the hundreds of pins are a total mood-killer for your photos.  And the thing is, your stitchwork is going to look just as gorgeous once it’s dried and off the mat — even more gorgeous in fact, because you can lift it up and let the stitches really shine in the light and the breeze.  So go ahead and love your project while it’s blocking, but wait to take the photos until you unpin it and set its beauty free!

Choose a Simple Background

Just as we discussed with project portraits, your eye gets confused about where to look when the background is cluttered or complicated — whereas a simple background will make your project really pop.


Sept 2014 Mini-Skein Colourways


And here’s some great news: the simplest background is super easy and super cheap!  So yesterday, I grabbed a bundle of the SpaceCadet’s September Mini-Skeins and, literally 30 seconds, I had a “studio” set up and snapped these images.

Don’t they look great?  Clean, crisp, and professional.  Want to see what the “studio” looked like?  Ok, here ya go!…

How to Create Professional Studio Shots

It’s a piece of 75¢ posterboard propped up against a wall outside.  That’s it!  The sun provides amazing light, the posterboard keeps the picture clean and uncluttered, and by propping it up (instead of laying it flat), it creates a never-ending backdrop.  Can you believe you can get such beautiful photos with something so simple and cheap?  Try it — you’ll be amazed at the results!

And remember, this set-up is for your detail shots, so you’re not trying to fit your entire project spread out on the posterboard — it probably won’t be big enough for that.  But if you use it when focus in on your lace edging, the collar, your beautiful seams, your stitches will pop and your project will look amazing!

Now, to take it up a level, let the smaller space encourage you to get creative with the way you display your work.  Try folding your sweater up neatly as if it were on a shelf and take some snaps like that.  Or instead of laying a scarf out flat, go for an accordion-fold to emphasise the colour progression.  There are so many possibilities!

 Try a Different Colour to Make Your Project Pop

Neutral is nice but sometimes white doesn’t do your project full justice.  Just like we saw that darker backgrounds can work wonders for your project portraits, sometimes a background of a contrasting colour can make your project really pop.  Working in a light coloured yarn?  Try posterboard in black or gray so the stitches stand out.  Warm colours jump off of purple or olive green.  Cool colours can look amazing against dark spice shades.  The best way to find out?  Experiment!  Grab your project and hold it against different colours to see what works.  And be bold — the best combinations can be quite surprising!

Try a Different Colour

Here I grabbed those same gradient Mini-Skeins and set them against a gray background.  Do you see how much the colours of the bottom row jump out of the gray rather than the white?  It’s an optical illusion — the colours are the same — but the contrast makes all the difference.

And do you want to see what this background actually was?  I didn’t have any gray posterboard to hand, so I just popped them onto an old storage tub that was sitting in the grass!  Sure, you can see a few scuff marks and imperfections, but the finished image looks really good, don’t you think?

How to Create Professional Studio Shots2

Try a Little Texture — But Just a Little

Texture is another great option for enhancing detail shots, but it’s a wee bit tricky.  Remember that a busy background confuses the eye and can detract focus from your project, so choose carefully.  The best textures are subtle — not too detailed and fairly mono-chromatic.

Take Better Project Photos - Try Some Subtle Texture

For this image, I just crumpled up a piece of tissue paper and then spread it out on top of my white posterboard.  The overall effect is still very neutral, but the tissue gives a little bit of subtle texture that adds interest without taking away from the main object.

Carefully Combine Colour And Texture

A carefully chosen combination of texture and colour together can create a wonderful effect too.  Nature can provide these in abundance but, again, the emphasis is on carefully chosen.  A project plonked down in some grass or stretched across a bush* will be competing for your eye’s attention with a hundred individual blades of grass or tiny leaves, and the effect will mostly be disappointing.

*Augh! That bush again!

Instead, go for a background where the texture is simple and the colour is complimentary to the project.   Here, I set the Multicolour Mini-Skein bundle (top) on a large, flat rock in my garden, and I just love how it brings out the sublime ocean colours of the blue skeins — and yet makes the pink skein sing out loud.  Then I set the Gradient Mini-Skein bundle (bottom) against the wood of my back porch. It’s true the texture in the grain is more pronounced, but it’s dark enough that it doesn’t overwhelm the yarn and the golds look just amazing against it, don’t you think?

Combine Colour and Texture Carefully


Get Creative!

Ok, so now you have some great tricks up your sleeve, it’s time to get a little creative.  The next time you’re on Ravelry, look past the projects and notice the backgrounds.  Which ones work and which ones don’t?  When you see a project picture that really jumps right out at you, take a moment to note the setting (I’m going to bet it’s not a blocking mat!).  Is it plain?  A little textured?  An unusual colour?

And start looking at your surroundings and seeing new possibilities.  Would your weathered wooden cutting board look good as a backdrop?  How about the floor tiles in the hallway?  Dianne always photographs her SpaceCadet stash against the pattern of her SpaceCadet project bag — and it looks both awesome and amazingly on-theme!  And Jade made the super-funky choice of photographing her project on a tyre.  I love that kind of creative thinking!

Backgroundes by Jade & Dianne

And just to get your creative juices flowing, let’s try this:  Come on over to the SpaceCadet group and share your favourite close-up project photograph (click here).  It can be one that you took awhile ago or a new one inspired by these tips.

Share with us why you like the background, or what you would do to change it.  And then…   tell me your best guess at what the background is for the photograph below.  And I’ll give the first person to guess correctly free shipping  on their next SpaceCadet order.  Sound good?  So get snapping — I can’t wait to see your photos!

Addicted to Mini-Skeins - Yeah, Join the Club


Join In on Our Idea Bank!

We are all busy this week prepping the August Mini-Skein Club bundles (and I think they’re going to be a real treat this month, whether you’ve picked the Ombre&Gradient Mix or the Multicolour Mix — really fun colours coming your way!).

Mini-Skein breakdown

But I wanted to quickly share with you something wonderful that’s been happening in the SpaceCadet group on Ravelry!   Now, we love collecting Mini-Skein project ideas for our club members on our Mini-Skein Ideas board on Pinterest — there are just so many fabulous and creative ways to add colour to your projects and scrolling through our Pinterest board is downright delicious.

But then I had a brainwave!  As well as our collection on Pinterest, why not make this collaborative, and have all of you guys add your ideas too?  So I started a thread on Ravelry — a place to share Mini-Skein project ideas and create a gorgeous look-book of patterns, an idea bank that we all contribute to.  And it has become absolutely magic!

The SpaceCadet's Mini-Skein Ideas thread on Ravelry


There are just two rules, and they are simple (and pretty fun too!):

  • Every suggestion has to include an image. Whether it’s a pattern on Ravelry or your own project, the idea is to create a visual idea book — and to be visual, it’s gotta have images! (and links are great too)
  • Chatting is welcome BUT you MUST also include an image and pattern idea in that same post. So, you can post a comment or reply to someone else’s post, but then you also have add in a pattern suggestion (and image) of your own in that post.

Want to join in the fun?  Click here to check out the thread.  And, hey, why not share your best Mini-Skein idea while you’re there?


Coming Soon

I’m crazy excited but I can’t say much, except to share this sneak peek…

Coming Aug 29 2

…and these two key words: gorgeous new pattern and fabulous new kits!  Mark your calendars for August 29th, and make sure you’re on the mailing list to be the first to hear about it!


Closing Soon

There’s less than one week left to order your fantastic SpaceCadet yarn bowl and mug from Pawley Studios.  The orders are flying and it’s been so much fun!  Don’t miss the chance to grab yours before they close on Aug 18!  Click here to order or learn more.

SpaceCadet Pawley bowls front page 2 FOR MAILCHIMP SpaceCadet Pawley bowls front page FOR MAILCHIMP